
How to Install Tongue and Groove Wall Panelling (Timber & Wood Panel Guide)
Most wall panelling projects fail before the first board even goes on the wall.
Not because the timber is bad.
Not because the panels are poor quality.
And not because tongue and groove systems are difficult.
The problem is usually preparation.
People rush measurements, install panels onto uneven walls, skip expansion gaps, use the wrong fixing method, or start with a crooked first board. Then the entire wall slowly drifts out of alignment, joints open up, and the finish looks amateur no matter how expensive the timber was.
That is avoidable.
Tongue and groove wall panelling is one of the most effective ways to transform an interior space. It adds texture, warmth, depth, and architectural detail while remaining achievable for many DIY projects.
This guide explains exactly how to install tongue and groove wall panelling, how to attach panelling to a wall properly, how to fit timber wall panels cleanly, and how to avoid the mistakes that ruin the final result.
If you want professional-looking wall panelling that actually lasts, read the entire process before picking up the nail gun.
What Is Tongue and Groove Wall Panelling?
Tongue and groove wall panelling is a system of interlocking boards designed to fit tightly together using a recessed groove on one side and a protruding tongue on the other.
Each board slots neatly into the next, creating a seamless wall surface with hidden joins.
Unlike flat decorative panels, tongue and groove systems create depth and texture while also helping conceal visible fixing points.
Common Materials Used for Tongue and Groove Panels
Solid Timber
Natural timber provides durability, authentic grain texture, and a premium finish.
Best for:
-
feature walls
-
traditional interiors
-
long-term durability
MDF Panels
MDF tongue and groove panels are affordable, smooth, and easy to paint.
Best for:
-
budget-friendly installs
-
modern painted interiors
-
DIY projects
Pine Panels
Pine remains one of the most common choices because it is lightweight and easy to work with.
Engineered Wood Panels
These provide improved stability and reduced movement compared to some solid timber products.
Why Choose Tongue and Groove Wall Panelling?
Wall panelling is not just decorative.
Done properly, it changes the feel of a room completely.
Main Benefits of Tongue and Groove Wall Panelling
-
Creates feature walls easily
-
Adds texture and architectural detail
-
Covers imperfect wall surfaces
-
Works in modern and traditional interiors
-
Easier to refresh than full wall reconstruction
-
DIY-friendly compared to some wall finishes
Many homeowners also choose tongue and groove panels because they provide a cleaner and more premium appearance than plain painted plasterboard.
Planning Before Installation
Good installations begin long before the first panel touches the wall.
Skipping planning is the fastest way to waste timber and create alignment problems.
Measure the Wall Area Properly
Measure:
-
wall height
-
wall width
-
window openings
-
door frames
-
switches and outlets
Do not assume walls are square.
Older homes especially may have uneven corners or bowed walls.
Measure multiple points across the wall surface and use the smallest tight measurement where required.
Check the Existing Wall Surface
Before installing wall panelling, inspect the wall carefully.
Suitable wall surfaces may include:
-
drywall
-
plasterboard
-
timber framing
-
brick walls
-
concrete walls
Repair:
-
cracks
-
loose plaster
-
damp areas
-
uneven sections
Tongue and groove boards follow the shape of the wall behind them. If the wall is uneven, the finished panelling usually will be too.
Choose the Right Panel Type
Different panel materials suit different budgets and room styles.
MDF Panelling
Best for painted finishes and lower-cost projects.
Timber Panelling
Best for durability and natural timber appearance.
Pre-Primed Panels
Help reduce finishing time during installation.
Narrow vs Wide Boards
Narrow boards create a more traditional look while wider boards often feel more modern.
Tools and Materials You’ll Need
Before starting installation, gather everything first.
Tools
-
tape measure
-
spirit level
-
stud finder
-
pencil
-
saw or jigsaw
-
nail gun or hammer
-
caulk gun
-
sanding block
-
clamps if needed
Materials
-
tongue and groove wall panels
-
construction adhesive
-
panel pins or finishing nails
-
screws if required
-
timber battens if needed
-
wood filler
-
caulk
-
primer, paint, or stain
How to Prepare a Wall for Panelling
Preparation determines whether the finished wall looks professional or sloppy.
Clean the Wall Thoroughly
Remove:
-
dust
-
grease
-
loose paint
-
wallpaper residue
-
protruding screws or nails
Adhesives bond poorly to dirty surfaces.
Mark Stud Locations
If fixing panels mechanically, locate and mark wall studs before installation.
This provides secure fixing points and prevents weak attachment.
Check for Level and Plumb
Use a spirit level to establish:
-
vertical plumb lines
-
horizontal reference lines
Never trust corners or ceilings to be perfectly straight.
How to Install Tongue and Groove Wall Panels Step by Step
Now the main installation process.
Step 1: Plan the Panel Layout
Decide whether the panels will run:
-
vertically
-
horizontally
Vertical installations are most common because they visually increase wall height.
Plan where joins, corners, and cut sections will fall before cutting anything.
Avoid ending with tiny slivers of board in visible corners.
Step 2: Measure and Cut the Panels
Measure each board carefully before cutting.
When cutting:
-
support the panel properly
-
use a fine-tooth blade
-
cut slowly to reduce splintering
For outlet cut-outs and switches:
-
mark carefully
-
measure twice
-
cut once
Bad cuts are difficult to hide later.
Step 3: Install Battens if Required
Battens may be necessary when:
-
walls are uneven
-
airflow behind panels is needed
-
additional fixing support is required
Typical batten spacing depends on the panel system and wall condition.
Battens help create a flatter finished installation.
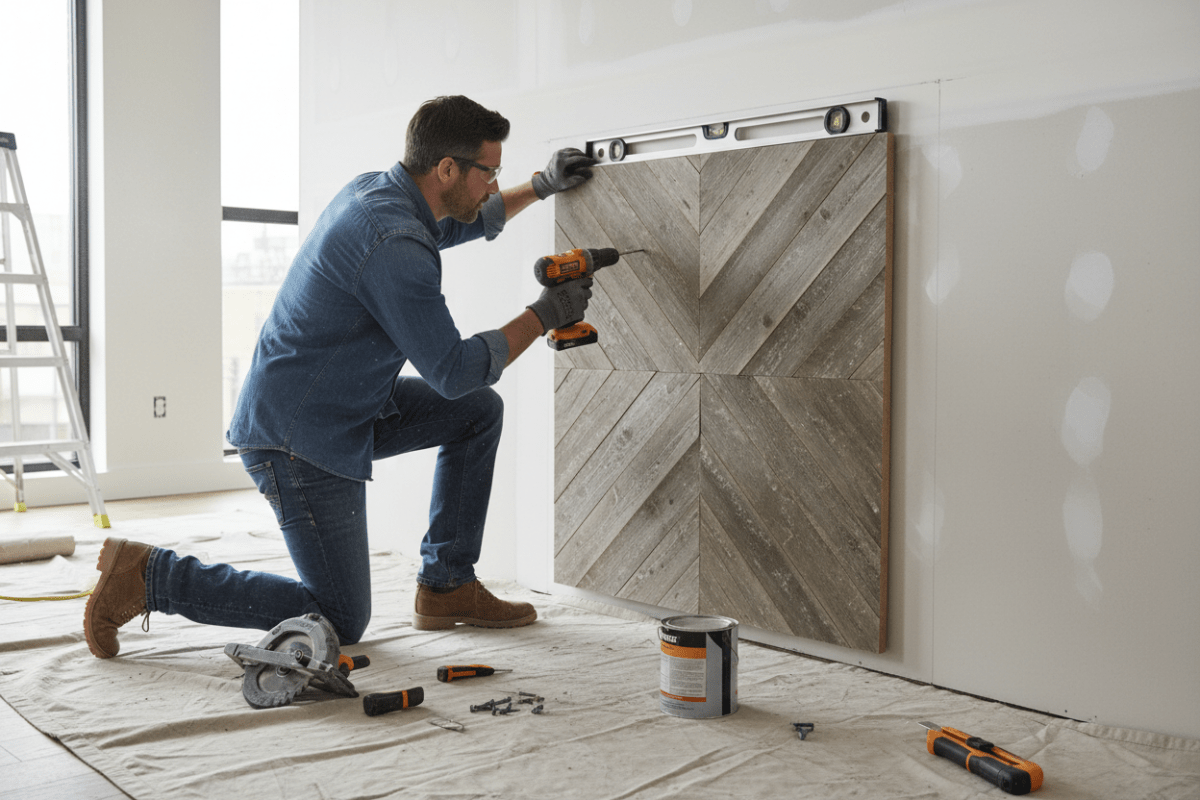
Step 4: Install the First Panel
This is the most important panel on the wall.
If the first board is crooked, every board after it follows the mistake.
Use a plumb reference line and install the first panel carefully.
Secure it using:
-
construction adhesive
-
panel pins
-
nails into studs
-
screws where appropriate
Check alignment repeatedly before continuing.
Step 5: Install Remaining Tongue and Groove Panels
Slide each tongue firmly into the adjacent groove.
Ensure:
-
joins are tight
-
spacing remains consistent
-
boards remain level
Depending on the system, panels may be:
-
nailed through the tongue
-
glued directly to the wall
-
mechanically fixed with clips
Avoid forcing panels together aggressively, as this can damage the edges.
Step 6: Fit Panels Around Corners and Fixtures
Carefully measure around:
-
windows
-
doors
-
light switches
-
power outlets
-
trims
Use neat cuts and maintain expansion gaps where necessary.
Corners usually require:
-
internal corner trims
-
external corner trims
-
careful scribing for tight finishes
Step 7: Finish the Wall Panelling
Once all panels are installed:
-
fill nail holes
-
sand rough areas
-
caulk visible gaps
-
clean excess adhesive
Then apply:
-
primer
-
paint
-
stain
-
protective sealant
depending on the chosen finish.
How to Attach Panelling to a Wall Properly
Different walls require different fixing methods.
Adhesive Fixing
Construction adhesive works well for:
-
smooth plasterboard
-
flat drywall
-
prepared surfaces
Use manufacturer-approved adhesive only.
Too much adhesive can create uneven pressure behind panels.
Nail or Screw Fixing
Mechanical fixing provides stronger long-term attachment, especially for timber boards.
Best for:
-
stud walls
-
battens
-
uneven surfaces
Hidden fixing through the tongue helps maintain a clean appearance.
Installing on Brick or Concrete Walls
Brick and concrete walls often require:
-
battens
-
masonry screws
-
plugs or anchors
Direct gluing may not always provide reliable long-term support.
How to Install Timber Wall Panelling Correctly
Real timber moves naturally with temperature and humidity.
Ignoring this causes gaps, swelling, or buckling later.
Acclimate the Timber First
Leave timber panels inside the room for at least 48 hours before installation.
This allows the wood to adjust to the environment.
Allow for Expansion
Do not install timber boards overly tight against surrounding surfaces.
Small expansion gaps help prevent future movement problems.
How to Install Wood Panelling on Walls
Wood panelling works for:
-
full feature walls
-
half-height panelling
-
bedroom walls
-
hallway upgrades
-
ceiling applications
Vertical vs Horizontal Installation
Vertical Panelling
Makes ceilings appear taller.
Horizontal Panelling
Can make narrow rooms feel wider.
Choose orientation based on the room proportions and desired visual effect.
Common Mistakes to Avoid
Most wall panelling failures are predictable.
Starting Without a Level Reference
The entire wall drifts out of alignment.
Poor Measurements
Creates visible gaps and wasted material.
Using Too Much Adhesive
Can create hollow spots and uneven boards.
Ignoring Expansion Gaps
Timber movement eventually causes pressure problems.
Installing Over Uneven Walls
Panels follow the surface behind them.
Rushing the Finish
Messy filler, sanding, or paint ruins otherwise good installation work.
How Much Does Tongue and Groove Wall Panelling Cost?
Costs vary depending on:
-
panel material
-
wall size
-
room complexity
-
labour
-
finish quality
Budget-Friendly Option
MDF tongue and groove panelling.
Mid-Range Option
Pine or engineered timber panels.
Premium Option
Hardwood timber panelling with professional finishing.
Professional installation costs increase when:
-
walls require repair
-
battens are needed
-
complex cuts are involved
-
premium finishes are chosen
Painting and Maintaining Wall Panelling
Proper maintenance helps wall panelling last for years.
Cleaning Tips
Use:
-
soft cloths
-
mild cleaners
-
non-abrasive products
Avoid excessive moisture exposure unless the product is rated for wet areas.
Repainting Timber Panels
Light sanding and proper primer preparation help achieve smoother repainting results later.